Have To Craft
Friday, February 10, 2012
Thursday, December 15, 2011
Paper Beads |
| As promised, here is my tutorial on how to make paper beads. I'm going for cylindrical beads since they are super easy and great for beginners. |
 |
| You can see the pretty pattern on it here. I love it! |
 |
| I used an old piece of sheet music that was destined for the recycle bin. |
 |
| A paper cutter is a super handy thing to have around when you work with paper a lot. It won't replace a good pair of scissors, but it sure will get lots of use if you follow my blog. |
 |
| I cut it into 1 inch strips. I wouldn't make them any bigger. They don't hang well on a necklace if they are too long. |
 |
| WATCH YOUR FINGERS!!!!! THOSE THINGS ARE SHARP! |
 |
| Now you have several strips. I cut out some of the blank parts of the page to make it have the pattern all over the bead. Otherwise you'd have some blank beads. |
 |
| Now you need some glue. I use a glue stick. It's neater than anything else I've tried. |
 |
| Just slip in the clip. You have now saved yourself about 20 bucks. Aren't you handy?! |
 |
| Slip the end of the paper into the beading tool and turn until you have a nice curl to the paper. You'll be gluing it next and then you'll slip it back into the tool to wind it up. |
 |
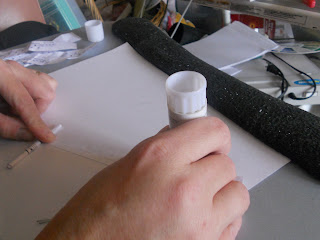
| Put the glue stick over the majority of the paper all the way to the end. You don't want glue on the part you'll slip into the beading tool. |
 |
| Just roll it up around your beading tool and remove the tool once it's wound tightly and nicely glued. |
 |
| You'll need to seal the beads to make them more durable. You can use either a Modge Podge type product or a spray sealer made for paper. I like the spray better. |
 |
| A few coats of Modge Podge will do it. But it is more time consuming than the spray. It dries slower too. |
 |
| Just spray a coat or two of the varnish on them to make them a bit more durable. You can also use a high gloss varnish for a nice shine. |
 |
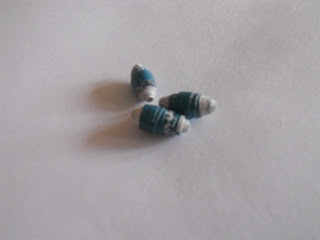
| Here is the end result. You did it! |
 |
| Here's a template that I got from Amazon.com showing some of the many shapes you can make. |
 |
| Here are some beads made from a triangle piece of paper. |
 |
| I get lots of compliments on this. I just put glitter on purple paper. |
| Making paper beads is a great way to recycle junk mail. |
| This is made from white paper beads and black plastic beads. |
 |
| Here's a nice closeup of the paper beads. They're easy to make. Look for a tutorial later today. |
Wednesday, December 14, 2011
Paperclip Jewelry
I made this necklace from stainless steel paperclips. A little creativity, a pair of jewelry pliers, and some turquoise were all I needed to make my Mom's gift for Christmas this year. Experiment with your pliers and some paperclips and before you know it you'll be creating a work of art.
 |
| Round nosed jewelry pliers can be found at most craft stors. I got these at Micheal's. |
 |
| The rounded tips of the piers help you make a natural, consistent curve to the links. |
 |
| Looking at the links you've already done will help you keep them uniform in size and shape. I ended up clipping off about 1/6 of the paperclip to make them the size I wanted. |
Subscribe to:
Comments (Atom)

